
FeraSign makes it easy to send a PDF or Word document to one or more people for electronic signature. This quick-start guide walks through creating and sending your first signature request.
You will need the document you want signed and the name and email address of each signer.
1. Start a New Signature Request
From the FeraSign home screen, click New signature request.
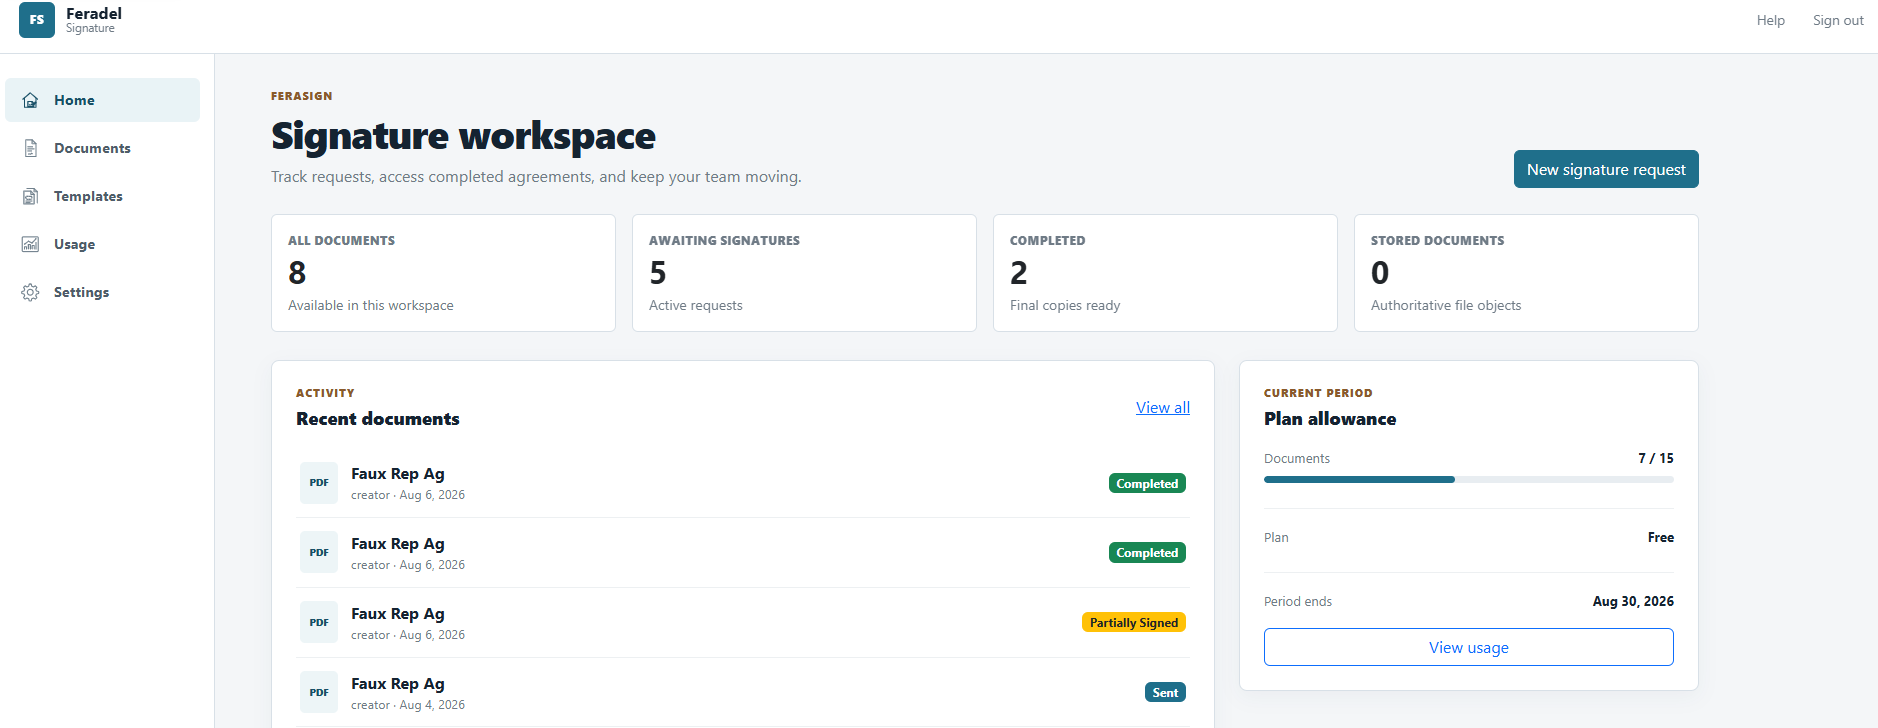
You can also open Documents from the left menu and click New request.
2. Add Your Signer
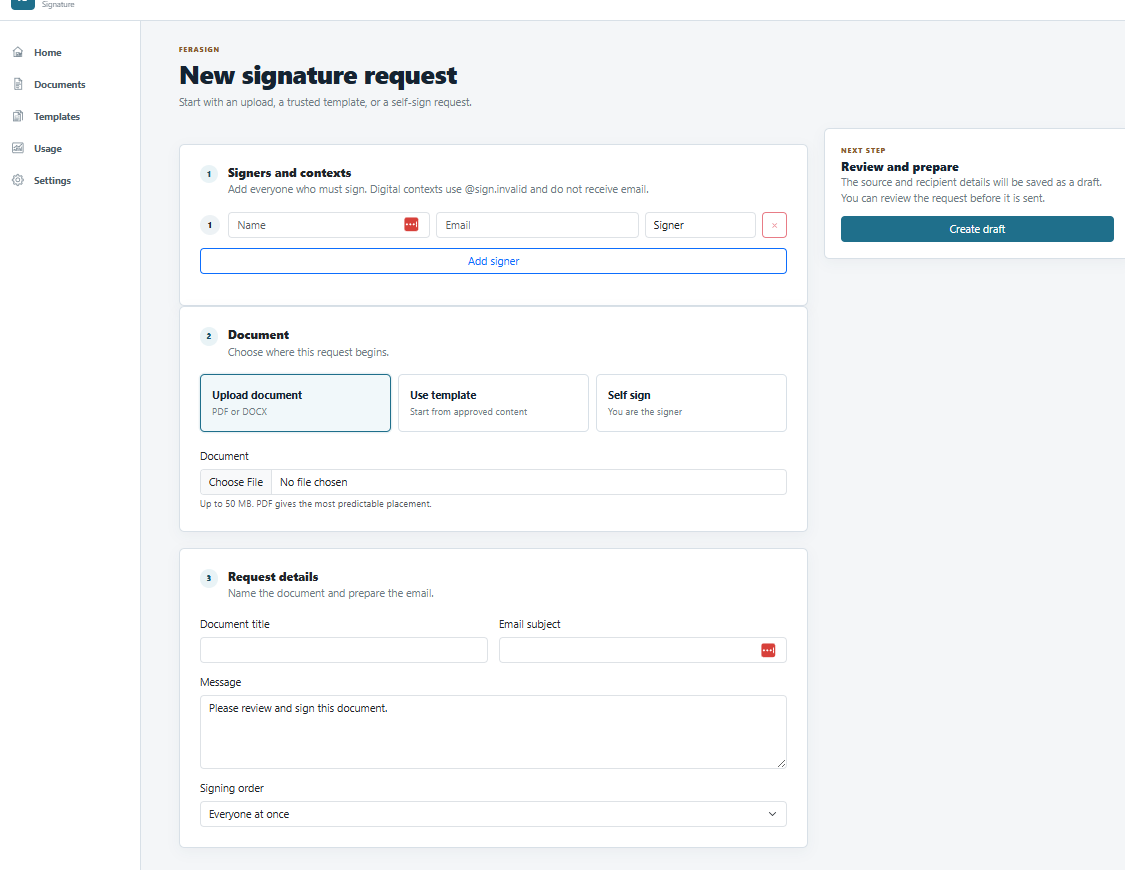
Under Signers and contexts, enter the name and email address of the person who needs to sign the document.
- Name: Enter the signer’s name.
- Email: Enter the email address where the signing request should be sent.
- Role: Leave the recipient as Signer for a normal signature request.
If more than one person needs to sign, click Add signer and enter the additional recipient.
3. Choose Your Document
Next, choose how you want to create the request.
- Upload document — upload a PDF or DOCX file from your computer.
- Use template — start from a reusable FeraSign template you have already prepared.
- Self sign — use this when you are the person signing the document.
For your first request, select Upload document, click Choose File, and select the document you want signed.
Tip: PDF files generally provide the most predictable placement of signature fields.
4. Enter the Request Details
Under Request details, enter the information that will identify the request and appear in the email sent to your signer.
- Document title: Give the request a useful name, such as Representation Agreement – John Smith.
- Email subject: Enter the subject line the signer will see.
- Message: Add a short message explaining what you need the recipient to do.
The default message, Please review and sign this document, is appropriate for many requests.
Signing Order
If your request has multiple signers, use Signing order to control whether everyone can sign at the same time or whether the document must move from one signer to the next.
For a simple request, leave this set to Everyone at once.
5. Create the Draft
When the signer, document, and request details are complete, click Create draft.
FeraSign saves the request as a draft before anything is sent. This gives you a chance to review the document and add the places where the signer must sign or enter information.
6. Add Fields to the Document
The preparation screen lets you place the fields the signer must complete onto the document. Common fields include Signature, Initials, Date signed, Printed name, Email, text fields, checkboxes, radio groups, and dropdowns.
Place each field where the signer should complete it. If your request has more than one signer, make sure every field is assigned to the correct person.
7. Review and Send
Before sending, quickly confirm that the signer’s name and email are correct, the right document was uploaded, fields are positioned correctly, each field belongs to the right signer, and the signing order is correct.
Once everything looks right, send the signature request.
8. Track the Request
After sending, open Documents from the left menu to follow the request.
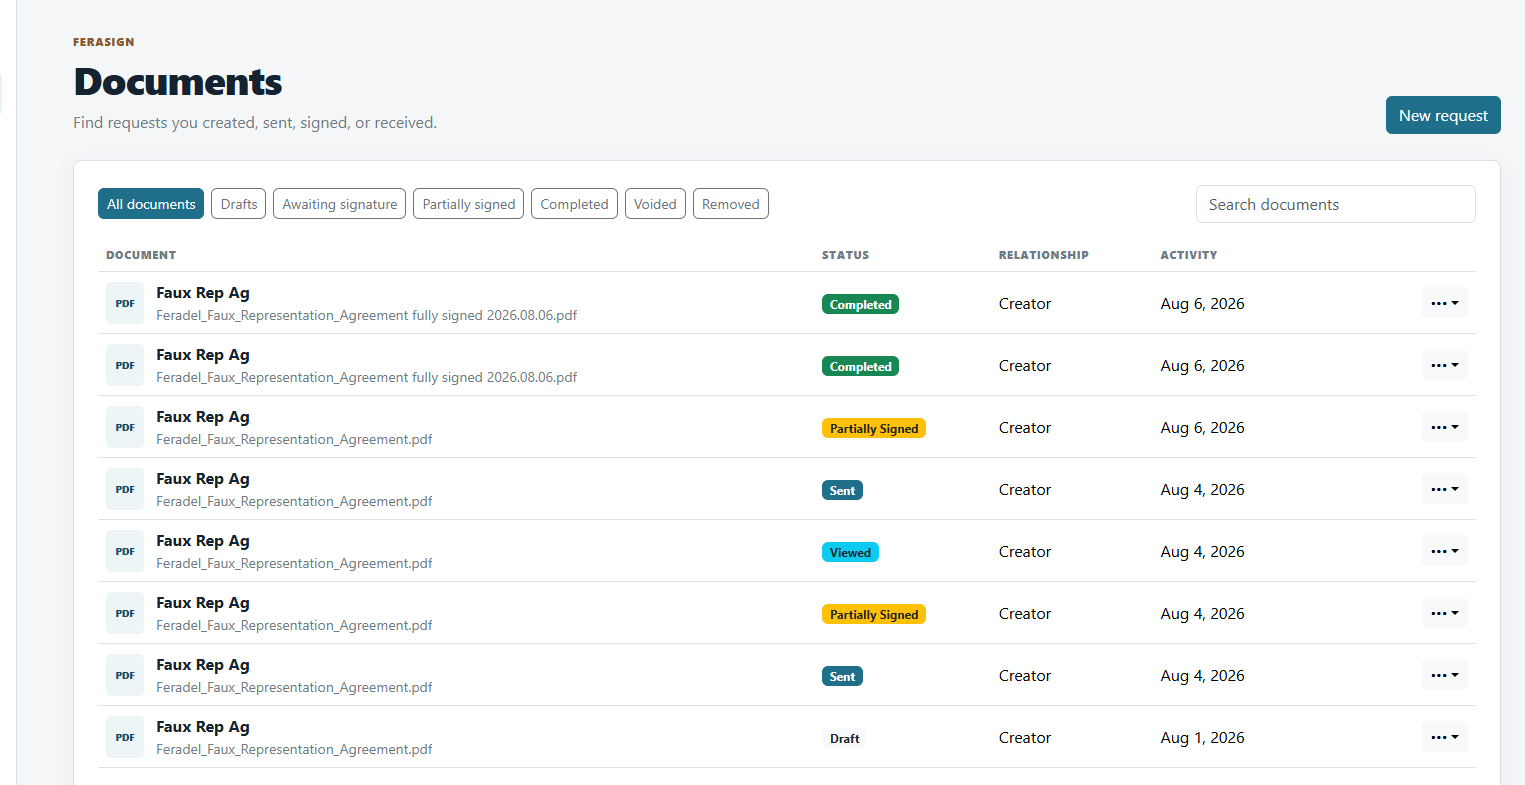
- Draft — the request has not been sent yet.
- Sent — the request has been sent.
- Viewed — a signer has opened the request.
- Partially Signed — some required signing activity is complete.
- Completed — all required signing activity is complete.
9. Get the Completed Document
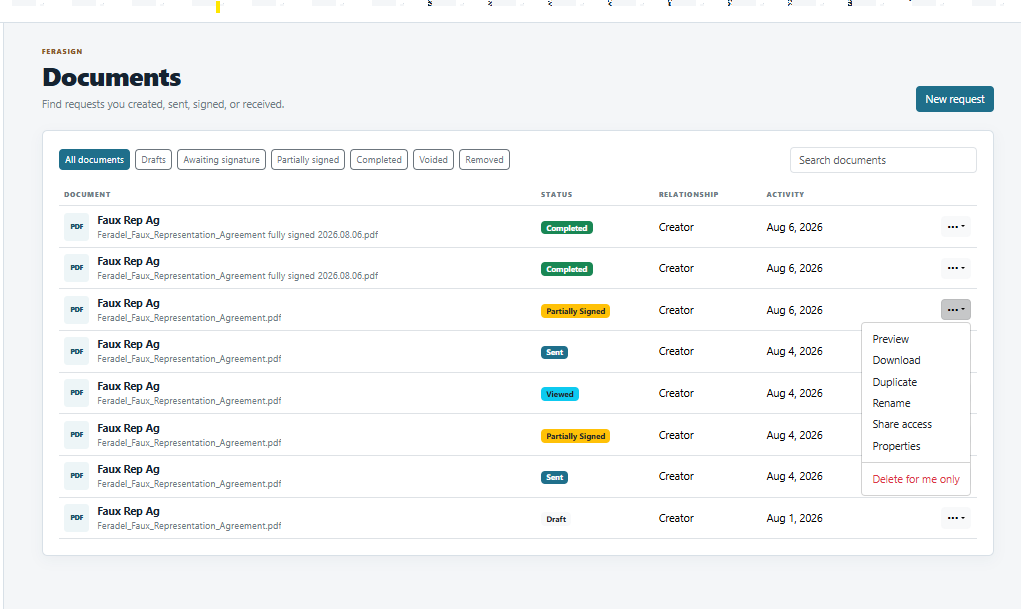
When the request shows Completed, open the three-dot menu beside the document. Select Preview to review it in FeraSign or Download to save a copy.
That’s It
You have created your first FeraSign signature request.
Add signer → Upload document → Enter request details → Create draft → Add fields → Review → Send → Download the completed document.
Once you are comfortable sending individual documents, the next step is learning how to create a reusable FeraSign template.